Easy Origami Flower Light: DIY Lamp Tutorial
DIY Flower Lights are a magical way to bring a touch of handcrafted beauty and soft illumination into your home. Imagine a delicate bloom, its petals crafted from paper, gently glowing from within – a perfect, whimsical accent for any room. This project is wonderfully suited for complete beginners and kids alike, making it an ideal activity for a fun afternoon. You can expect to complete one flower light in roughly 30-45 minutes, and they make absolutely charming handmade gifts or lovely decorative pieces. In this tutorial, I’ll guide you step-by-step through the simple folding techniques to create your own radiant paper flower. Get ready to unfold some light and creativity – let’s get folding!

Crafting a Bloom of Light: Your Origami Flower Lamp Tutorial
Hello there, fellow paper crafter! I’m so excited to guide you through the creation of a beautiful DIY Flower Light. This project combines the delicate art of origami with the cozy glow of a light source, resulting in a stunning and personalized decoration that’s surprisingly achievable, even for beginners. We’ll be folding a modular origami flower, where multiple units come together to form a radiant bloom. Get ready to transform simple paper into something truly magical!
Choosing Your Paper: The Foundation of Your Flower
The paper you choose is absolutely crucial for this project. It’s not just about color; it’s about how the paper behaves during folding and how it interacts with light.
For this flower, I highly recommend using origami paper. It’s designed specifically for folding, offering a good balance of strength and thinness. Standard origami paper is usually square, typically 15cm x 15cm (6 inches x 6 inches) or 20cm x 20cm (8 inches x 8 inches). For a single flower unit, a 15cm square is a great starting point. If you want a larger, more imposing flower, you can use 20cm squares.
In terms of weight, standard origami paper is usually around 70-80 gsm (grams per square meter). This is perfect – not too flimsy that it tears easily, and not too thick that it becomes bulky and difficult to fold precisely.
Single-sided origami paper is fantastic for this project. It has a colored side and a white side. When we fold, the white parts will show through in places, creating a lovely contrast and depth within the petals. If you only have double-sided paper, that’s fine too! You’ll just have a more uniformly colored flower. Avoid cardstock or very thick paper, as it will be very challenging to fold neatly and create the sharp creases needed for the final structure.
Mastering the Base Folds: Precision is Key
Before we dive into the flower itself, let’s get comfortable with a few fundamental folds that we’ll use repeatedly. Practicing these will make the rest of the process much smoother.
The Valley Fold:
This is the most common fold. Imagine you’re folding a piece of paper in half. You bring two edges or corners together, creating a crease that dips inwards, like a valley. To make a clean valley fold, align the edges or corners precisely. Run your fingernail or a bone folder firmly along the crease line. The crisper the crease, the better your final model will hold its shape.
The Mountain Fold:
This is the opposite of a valley fold. Imagine you’re folding a piece of paper so the crease pops outwards, like the peak of a mountain. Often, you’ll make a valley fold first, and then unfold the paper. When you then fold along that same crease line in the opposite direction, it becomes a mountain fold. Again, precision in alignment and a firm crease are essential.
The Diagonal Fold:
This involves folding the paper in half along a diagonal line, bringing two opposite corners together. For a square piece of paper, this means aligning a top corner with a bottom corner, or a left corner with a right corner. Make sure the corners meet exactly before creasing firmly.
The Squash Fold:
This one can feel a bit tricky at first, but it’s incredibly useful! You typically start with a flap of paper that is partially opened. You then press down on the top of this flap, allowing the sides to open outwards and flatten. The goal is to create a flat diamond shape from a folded section. The key is to guide the paper so it flattens symmetrically.
Practice these a few times on scrap paper. You’ll get a feel for how much pressure to apply and how to align things perfectly.
Your Origami Flower Lamp: A Step-by-Step Journey
Now, let’s begin folding our individual flower units. You’ll need to make several of these, depending on the size of the flower you want. For a decent-sized flower, I usually make 12 units.
Start with your square piece of origami paper, colored side up (if using single-sided paper).
1. **Diagonal Fold:** Fold the paper in half diagonally by bringing the bottom left corner up to meet the top right corner. Crease firmly. Unfold.
2. **Second Diagonal Fold:** Now fold the paper in half diagonally the other way, bringing the bottom right corner up to meet the top left corner. Crease firmly. Unfold. You should now have an ‘X’ crease pattern on your paper.
3. **Horizontal and Vertical Folds:** Flip the paper over so the white side is facing you. Fold the paper in half horizontally by bringing the bottom edge up to meet the top edge. Crease firmly. Unfold. Now, fold the paper in half vertically by bringing the left edge over to meet the right edge. Crease firmly. Unfold. You should now have a ‘+’ crease pattern on the white side.
4. **Waterbomb Base:** This is where we combine our creases. Hold the paper with the white side up. Gently push the left and right edges inwards towards the center. As you do this, the top edge will naturally come down. The creases you made will guide the paper. You want to collapse it into a triangle shape with two flaps on each side. This is called the waterbomb base. Make sure the point of the triangle is at the top.
5. **Folding the Flaps:** Take the top layer of the right flap and fold its bottom edge up to meet the top point of the triangle. Crease firmly. Repeat this with the top layer of the left flap, folding its bottom edge up to meet the same top point. You should now have a diamond shape on top of the triangle.
6. **Folding the Sides In:** Now, take the right edge of the diamond shape you just created and fold it inwards so it aligns with the center vertical crease. Crease firmly. Repeat this with the left edge of the diamond, folding it inwards to meet the center vertical crease. Crease firmly. You should now have a kite shape.
7. **Unfolding the Sides:** Unfold the two side folds you just made.
8. **Petal Fold:** This is a crucial step for forming the petal. Lift the bottom point of the *top layer only* upwards. As you lift, you’ll use the creases you made in step 6 to guide the paper. The sides of the flap you are lifting will want to fold inwards along those creases. Press down and flatten the entire flap into a diamond shape. This is a type of squash fold. Make sure the point of this diamond is perfectly aligned with the top point of the unit.
9. **Repeat on the Other Side:** Flip the entire unit over. You will see a similar kite shape on this side. Repeat steps 5 through 8 on this side to create the second half of your petal. You should now have a completed petal unit with two pointy ends.
10. **Repeat for More Units:** Make more of these petal units until you have the desired number for your flower (usually 12).
Once you have all your units, it’s time to assemble them.
11. **Connecting the Units:** Take two petal units. Notice each unit has a small pocket at the top (the point that was the original top of the triangle). You will insert the pointy tip of one unit into the pocket of another.
12. **Forming the Flower:** Continue connecting the units one by one, slotting the point of one into the pocket of the next. As you connect them, the flower will start to take shape. Gently curve the petals outwards as you go. When you connect the last unit, slot its point into the pocket of the very first unit to complete the circle.
Common Pitfalls and How to Avoid Them
Even with the clearest instructions, there are a couple of spots where beginners often stumble. Don’t worry if you encounter these; they are perfectly normal learning experiences!
* **Imprecise Creasing:** This is by far the most common issue. If your creases aren’t sharp and accurate, the paper won’t hold its shape, and the units won’t fit together snugly.
* **How to Avoid:** Be deliberate with every fold. Align edges and corners *perfectly* before creasing. Use your fingernail, a ruler edge, or a bone folder to press down firmly along the entire length of the crease. Think of it as giving your paper a strong “memory” of the fold.
* **Misidentifying Layers During Folding:** In steps 8 and 9, where we do the petal fold (the squash fold), it’s essential to only lift and fold the *top layer*. If you accidentally fold through multiple layers, the shape will be distorted, and the unit won’t look right.
* **How to Avoid:** Before you start lifting the flap, gently separate the top layer from the ones beneath it. Consciously focus on manipulating only that single layer. If you feel resistance or see multiple layers moving, stop, unfold, and try again, paying close attention to which layer you’re touching.
Varying Your Flower: A Touch of Personalization
The beauty of DIY is the freedom to customize!
* **Size:** As mentioned, the size of your starting square determines the size of your final units and thus your flower. Experiment with 10cm squares for smaller, daintier flowers, or 25cm squares for grand statements.
* **Paper Pattern and Color:** This is where you can really let your creativity shine!
* **Patterns:** Washi tape patterns, floral prints, geometric designs, or even patterned origami paper will give your flower a unique character.
* **Colors:** Use a single color for a classic look, or try color combinations. For example, use paper that is blue on one side and white on the other, and then alternate the orientation of the units during assembly to create a striped effect. You could also use two different colors of paper for alternating units.
* **Number of Petals:** While 12 is standard for a full, round flower, you can experiment with fewer units (e.g., 8 or 10) for a more open, star-like bloom.
Displaying and Gifting Your Creation
Once your origami flower light is assembled, it’s time to enjoy it!
* **As a Lamp:** The most common way to use this is as a lampshade. You’ll need a battery-operated LED light source. Small LED string lights or a single LED tea light are perfect. Gently thread the lights through the center of the flower, or place the tea light underneath. *Crucially, always use LED lights* as they do not generate heat and are safe to use with paper. Never use incandescent bulbs or candles, as they pose a fire hazard.
* **Decoration:** Even without a light, your origami flower is a beautiful decorative piece. Place it on a shelf, a mantelpiece, or as a centerpiece for a table.
* **Gifting:** This is a wonderfully heartfelt gift! Present it to friends, family, or colleagues. You can gift it as is, or perhaps attach it to a card or a gift basket. Imagine the delight of receiving a handmade, glowing flower!
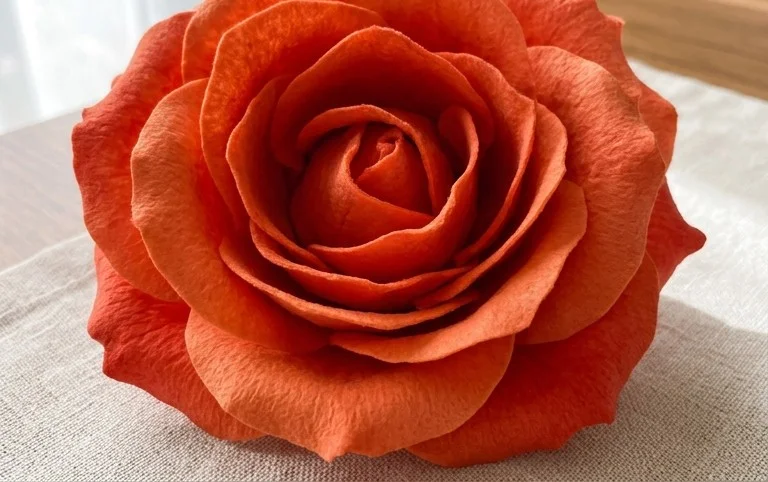
Creating this origami flower light is a rewarding process. It’s a chance to slow down, focus on the tactile nature of paper, and produce something beautiful that brings a little extra light and joy into your space. Happy folding!
Conclusion
Congratulations on completing your DIY Flower Light! We hope you enjoyed the process of bringing this beautiful paper creation to life. Don’t be discouraged if your first attempt isn’t perfect; think of it as valuable practice for your next folding adventure. We’d love to see your finished origami flower, so feel free to share your creation! For your next project, why not try a different colored paper for a vibrant bouquet, or perhaps experiment with adding a delicate paper leaf? There are so many wonderful paper projects waiting for you to explore. Happy folding!

